In short:
- Convert before thumbnails: turn each JPEG or PNG into WebP before WordPress makes its image sizes, so every size is WebP too.
- Cap the dimensions: scale uploads down to the largest size your theme shows. A new format does not shrink a photo that is far too wide.
- Our test result: a 339 KB JPEG became a 140 KB WebP at the same 1500 × 703 size, 59% smaller to deliver.
- Without a plugin: a WordPress filter makes the generated sizes WebP, but the uploaded original stays a full-size JPEG.
The fastest way to convert new uploads to WebP
The quickest route is to convert each file during the upload, before WordPress creates the attachment. Doing it by hand means resizing and exporting every photo as WebP first, which few people keep up for long.
We built WebP Auto Convert at ByteKeel to do that one job. It is free, needs no licence key, and works on anything that uses WordPress's normal upload: the Media Library, the block editor, page builders that use the media window, and the REST API. If the server cannot write WebP, the upload is kept as it is.
You can try it on a private WordPress in the ByteKeel playground. If you would rather not add a plugin, the code route is further down.
What happens when you upload an image
With WebP Auto Convert active, each upload goes through five steps inside the normal WordPress upload:
- Format check: the file type is matched against the formats you ticked, JPEG and PNG by default.
- Server check: the plugin confirms that GD or Imagick can write WebP. If not, the upload finishes as a normal JPEG or PNG.
- Upright and fitted: a sideways phone photo is turned upright, then scaled down to your maximum size. It is never enlarged.
- Saved as WebP: at your quality setting, under a name that never overwrites an existing file.
- Every size is WebP: WordPress builds its thumbnails from the WebP, at the same quality.
By default the original JPEG or PNG stays on disk next to the WebP. It is not listed in the Media Library, and deleting the image removes both files.
How we tested, and what changed
We uploaded a 1500 × 703 JPEG of a building exterior to a fresh WordPress 7.1 install in November 2026, with the default settings: quality 82, JPEG and PNG converted, original kept.
| File | Dimensions | Size |
|---|---|---|
| Uploaded JPEG (kept on disk) | 1500 × 703 | 347,373 bytes (339 KB) |
| Main WebP used by the site | 1500 × 703 | 143,570 bytes (140 KB) |
| Difference for the main delivered image | Same dimensions | 59% smaller |
The Media Library lists a single image whose file is the WebP and whose type is image/webp. Your own photographs will compress differently.
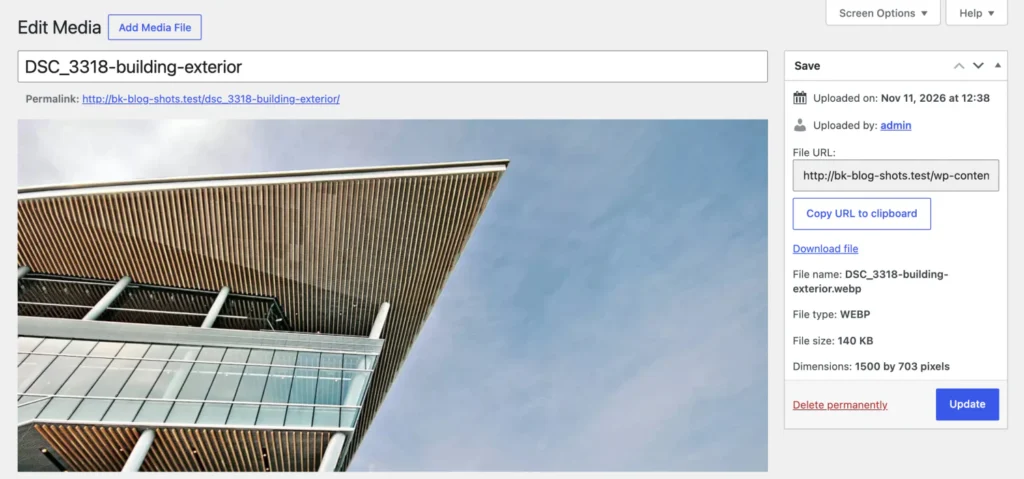
Because the original is kept, the 59% is a saving for visitors, not disk space. Disk use falls only if you delete originals, which you should do only after a backup and a visual check.
How do I convert uploads to WebP without a plugin?
Since WordPress 5.8, a short filter makes WordPress save the image sizes it generates as WebP. Set it up in this order:
- Check server support: go to Tools › Site Health › Info › Media Handling and look for WEBP among the formats of the active editor. Our guide on checking whether your host can create WebP covers the GD and Imagick catch.
- Create a must-use plugin: add a PHP file in
wp-content/mu-plugins, not a theme's functions.php that an update can overwrite. - Add the filter: paste the code below into that file.
- Upload a test JPEG: confirm that the Large and Medium sizes end in .webp.
- Resize big photos first: export them at about the width your theme shows, because the filter adds no size limit.
// Save new image sizes as WebP (WordPress 5.8+).
add_filter( 'image_editor_output_format', function ( $formats ) {
	$formats['image/jpeg'] = 'image/webp';
	$formats['image/png']  = 'image/webp';
	return $formats;
} );
The filter leaves three gaps:
- Original stays JPEG: the uploaded file is never re-encoded, so Full Size images and lightboxes still serve it.
- Old images untouched: existing images change only when their sizes are regenerated.
- Name changes: some plugins, older themes and email tools expect a .jpg thumbnail and may break, so test first.
Which WebP settings should I use?
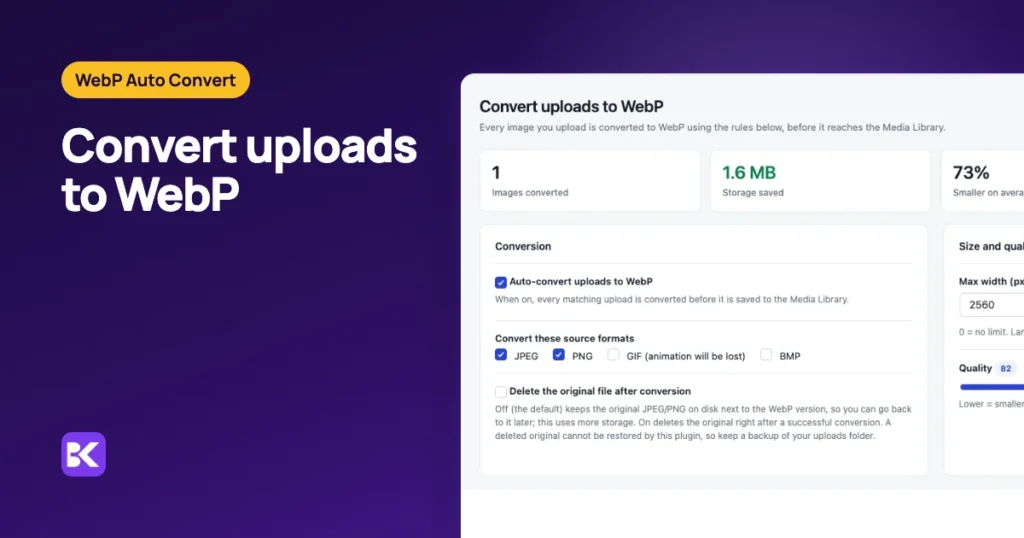
For most sites the defaults work: a 2560 × 2560 maximum, quality 82, JPEG and PNG converted, and originals kept. They live on one screen under Settings › WebP Auto Convert:
- Max width and height: 2560 suits full-width heroes on large screens. If your theme never shows an image wider than 1600 pixels, use that and save more. 0 means no limit.
- Quality: 80–85 suits most photos. Go higher for images with fine text or hard edges, because low values show blocking in smooth areas such as skies.
- Formats: JPEG and PNG are on by default. A GIF becomes a still WebP, so leave GIF off if you upload animations.
- Delete the original: off by default. The plugin cannot restore a deleted original, so turn this on only if your backups include the uploads folder.
We recommend keeping originals unless disk space is tight. They let you re-export at another size or quality, or switch to another format later, and visitors never download them.
Native filter vs WebP Auto Convert: which do you need?
The filter suits developers who only want WebP thumbnails and no extra plugin. WebP Auto Convert converts the uploaded file itself and caps its size. Use one or the other, not both.
| Criterion | WordPress filter | WebP Auto Convert |
|---|---|---|
| What becomes WebP | Generated sizes only; the original stays JPEG or PNG | The upload and every size |
| Size limit | None, apart from WordPress's own 2560 px scaled copy | Max width and height, 2560 px by default |
| Setup | Code in a must-use plugin | One settings screen |
| Server without WebP | Conversion fails, often without an error | Upload kept as it is; the settings screen explains why and counts it |
| Existing images | Only when sizes are regenerated; originals stay JPEG | Not converted |
| Cost | Free | Free, no licence key |
When you do not need WebP Auto Convert: you already export right-sized WebP files, a CDN already converts images on the fly, or your real problem is an existing library. For old images, a bulk conversion tool or TurboCache, which also covers lazy loading and page caching, fits better.
How to keep new uploads light
Four habits keep heavy images from creeping back:
- Run one converter: never stack the filter, the plugin and a CDN that converts images.
- Check the counters: after a few uploads, the settings screen should show images converted. Zero means the server is skipping them.
- Compare key photos: view important product and hero images at full display size after conversion.
- Purge caches after replacing: a re-uploaded image shows the old JPEG until the page cache and CDN are cleared.
Oversized images are also the usual reason a page's largest image loads last, as our slow Divi site test shows. To handle new uploads automatically, get WebP Auto Convert free.
Frequently asked questions
Will this convert images already in the Media Library?
No. WebP Auto Convert handles new uploads only. To convert an important old image, upload it again and replace it in the page, as our guide to existing images, CDNs and caching explains.
Should I delete the original JPEG or PNG?
Keep it unless disk space is a real problem and you have a tested backup. The source is useful when you need a different size, quality or format later.
Why do my WordPress uploads stay JPEG?
Usually the server has no WebP encoder, the format is not ticked, or the file skipped WordPress's normal upload, for example when copied by FTP. The settings screen tells you when the server cannot write WebP.
Do all browsers show WebP images?
All current versions of Chrome, Safari, Firefox and Edge do. The plugin keeps no JPEG fallback, so only very old browsers that cannot read WebP would miss the image.
Leave a Reply